

DIG 8855-5GB Micro Sprinkler on Spike 90, 180, 360 Degrees Strip (5 Pack)
Product Description
DIG 8855-5GB Micro Sprinkler on Spike 90, 180, 360 Degrees Strip (5 Pack)
- Recommended for under tree canopies, vegetable gardens, seedlings, flowerbeds, and groundcovers
- The spinner/rotor can be replaced with one of three spreaders with 90 Degree, 180 Degree, and strip spray patterns for a range of applications
- Double frame design provides balanced coverage with high uniformity
- Low flow rate
- Easy to dismantle, clean, and assemble
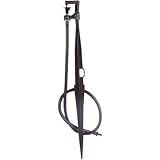
DIG's 8855-1GB (in packs of 1) and 8855-5GB (in packs of 5) are 360 Degree micro sprinklers with double frame design, completely assembled with 13" spike, 24" micro tubing, and barb. The micro sprinkler's spinner/rotor is balanced between the micro sprinkler's double frame and the nozzle, providing gentle and consistent uniformity over a wide area up to 25' in diameter. The micro sprinklers are a great choice for watering flowerbeds, groundcovers, vegetable gardens, and under tree canopies. The micro sprinklers are pre-assembled with a spinner for 360 Degree of coverage, and interchangeable spreader insert heads are included in the package for 90 Degree, 180 Degree, and strip patterns. Start the installation from a PVC pipe or to pipe thread If the micro irrigation installation is started from a PVC pipe, first shut off the main water supply. If an automated system is preferred, we recommend installing a 3/4†ball valve or gate valve before the battery operated controller or AC valve, if used. This ball valve can be very useful as an emergency backup to turn the system off. This type of arrangement is used by professional installers. Turn the water supply on to flush the line and then shut the water supply off using the new ball or gate valve. Install an AC valve or battery operated controller, wrapping TEFLON tape on all the male thread fittings used. Turn the water supply on again to pressurize the system. The unit will open momentarily and then will shut off. Test the valve or the battery operated controller and make sure that it is working correctly. If using a battery operated controller, program it. After the AC valve or battery operated controller, add a 3/4†screen filter with 155-mesh (model D55). The screen filter is used to protect the micro irrigation system. Next, add a preset 25 PSI pressure regulator (model D46P) or adjustable pressure regulator (model PRV075). The pressure regulator is used to lower the pressure to the suggested operating pressure for a micro/drip system. Follow with a 3/4†swivel adapter (model 50001) to the drip tubing or 3/4†PVC thread x slip adapter to the PVC line. Start the installation from a faucet or hose thread If an automated system is preferred, install one of DIG’s hose end timers. Test the hose end timer and make sure that it is working correctly, and then program it. To the hose end timer, add a backflow device (model D45), then a 25 PSI pressure regulator (model D46) and follow with a 3/4" swivel adapter with a screen (model C34). If water quality is a concern, we highly recommend using a fine mesh 3/4" filter with 155-mesh (model D57A). Product installation Use the drip tubing as the main lateral or sub lateral and lay out the drip tubing per your layout. Secure the drip tubing to the ground using stakes (model R60). Use the stake holders to secure the drip tubing or drip line to the ground in key areas and add more stakes as you unroll the drip tubing. Add stakes every 10'-20’ and at the end of each section, or as needed. An extra 1% of drip tubing length should be added to each lateral to compensate for drip tubing contraction at low temperature. Throughout the installation and per your drawing layout, add, if needed, 1/2†fittings, such as tees (model C35) and elbows (model C36), leaving the end of the drip tubing open. To install the 1/2" compression drip fittings, cut the drip tubing with a hand pruner, being careful to keep dirt from entering the line. Hold the fitting in one hand and the drip tubing in the other and force the drip tubing into the compression fitting by wiggling it from side to side. The micro sprinklers or micro sprayers are installed along the drip tubing at varying or at specific intervals. The distribution uniformity of water from the micro sprinklers or micro sprayers along the line depends on the incoming pressure, number of micro sprinklers or micro sprayers used per lateral and lengths of the laterals. Special care should be taken to ensure high uniformity of water along the laterals by not exceeding the product recommendations. To install a micro sprinkler, punch a hole into the drip tubing using the small punch (model D44) or the gun punch (model 16-035), and snap the 1/4†barb at the end of the micro tubing into the drip tubing. The micro sprinkler should be elevated to a minimum of 8†above ground for best coverage. To replace the spinner/rotor with one of the 90°, 180° or strip pattern spreader inserts included in the package, review the following steps Step 1: Turn the nozzle assembly with the micro tubing counter clockwise and remove the nozzle assembly and the spinner/rotor mounted between the double frame and the nozzle assembly Step 2: Insert one of the spreader inserts with the pin forced to the location on the double frame housing. Move the spreader insert into position by turning it left or right Step 3: Insert the nozzle assembly with the micro tubing and turn it clockwise to lock 5. Turn the water on and flush the line. 6. Close the end of the drip tubing using the hose end (model Q58) or figure “8†(model F68B). 7. Pressure-test the system to identify leaks in the drip tubing laterals, fittings and barb connections. Make sure that all the micro sprinklers are standing in a vertical position and operating with good uniformity, and then program the hose end timer or battery operated controller.
Technical Specifications
You might also like

Dig 108-1B 180 Degree Drip Fan Spray Jet on Spike with 12" Microtube & Barb

Rain Bird T63-100S Drip Irrigation 1/2" (.630" OD) Blank Distribution Tubing, 100' Roll, Black
Dig 111B 180 Degree Drip Irrigation Spray Jet, (10 Pack), Blue

Raindrip A184010B 10-Count Full Circle Rotary Adjustable Sprinkler
DIG 8855-1GB Micro Sprinkler on Spike 90, 180, 360 Degrees Strip

Rain Bird FCKIT-1PK Drip Irrigation Easy Fit Faucet Connection Kit for 1/2" Tubing, Includes Pressure Regulator and Filter

Raindrip 307050B Barbed Tees, 1/4-Inch, 50 Per Bag